| Home | Getting started | Managing users | Collecting work | Shared folders | Backups | Advanced options |
|---|
Virtualbox with Raspi-LTSP
Note this method is not officially supported although should work anyway.
Virtualbox provides a free, simple and easy to use solution for virtualising your Raspi-LTSP server.
Virtualisation... what is that?
Virtualisation is basically running a second virtual computer inside (and at the same time as) your normal computer.
Each virtual install is completely separate from anything else, as the virtual hard drive is just a single file, you can delete the entire virtual operating system extremely easily.
Virtualisation should not be confused with multithreading or hyper-threading. These only run 1 operating system but allow you to run more than 1 program at a time.
Do note though, you need a slightly more powerful computer than if just installing Ubuntu directly to the internal hard drive (as it has to run your normally operating system and Ubuntu at the same time).
Do I need a special type of computer?
A duel core or quad core computer from the past 4-5 years with at least 4GB of ram is highly recommended.
If you run into issues with virtualisation (crashes or failing to load), you may want to check as hardware CPU virtualisation may have to be turned on in your BIOS.
On Intel based processors this is called Intel Virtualisation Technology or Intel-VT and on AMD processors it is called AMD-V.
Ok, lets get started
- Download Ubuntu 14.04 for your platform (32 bit or 64 bit, if in doubt download the 32 bit version) from here.
- Download Virtualbox platform package for your host operating system (aka Windows, Mac or Linux) from here. This should be what your computer is currently running.
- Once downloaded, run the installer selecting all the default options.
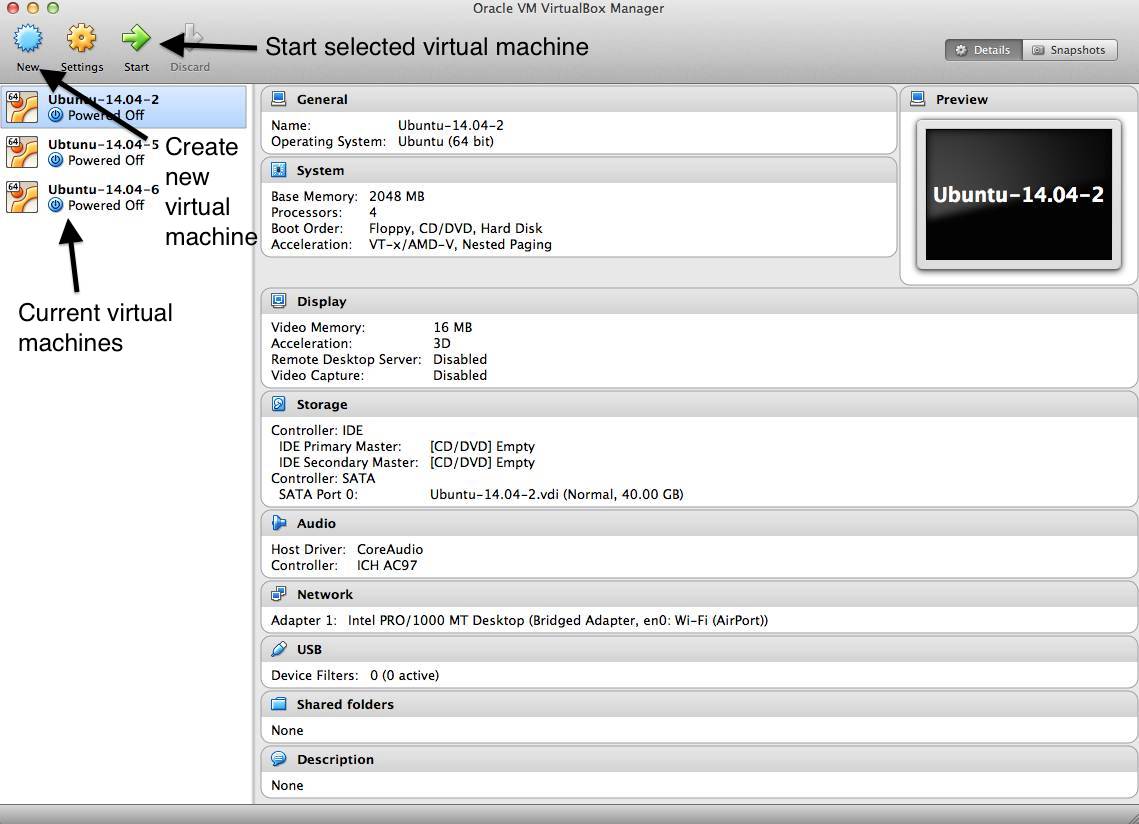
- Once installed, launch Virtualbox.
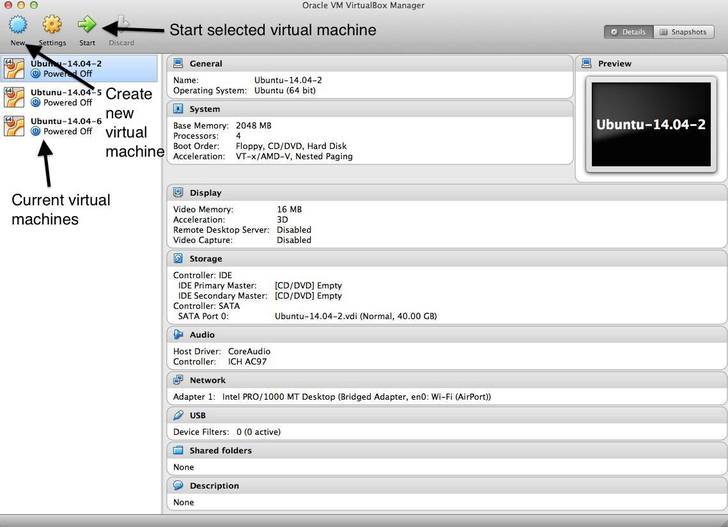
- In the screenshot above, I have 3 virtual machines already. You won't have any, so lets create one! Select the
Newbutton.
- Enter a name for your virtual machine, select
Linuxfor the type andUbuntu (32 bit)orUbuntu (64 bit)for Version depending on which version you downloaded earlier. Then hit continue.

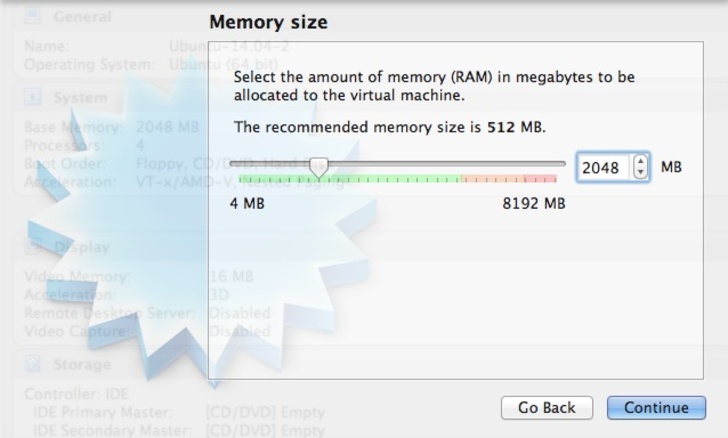
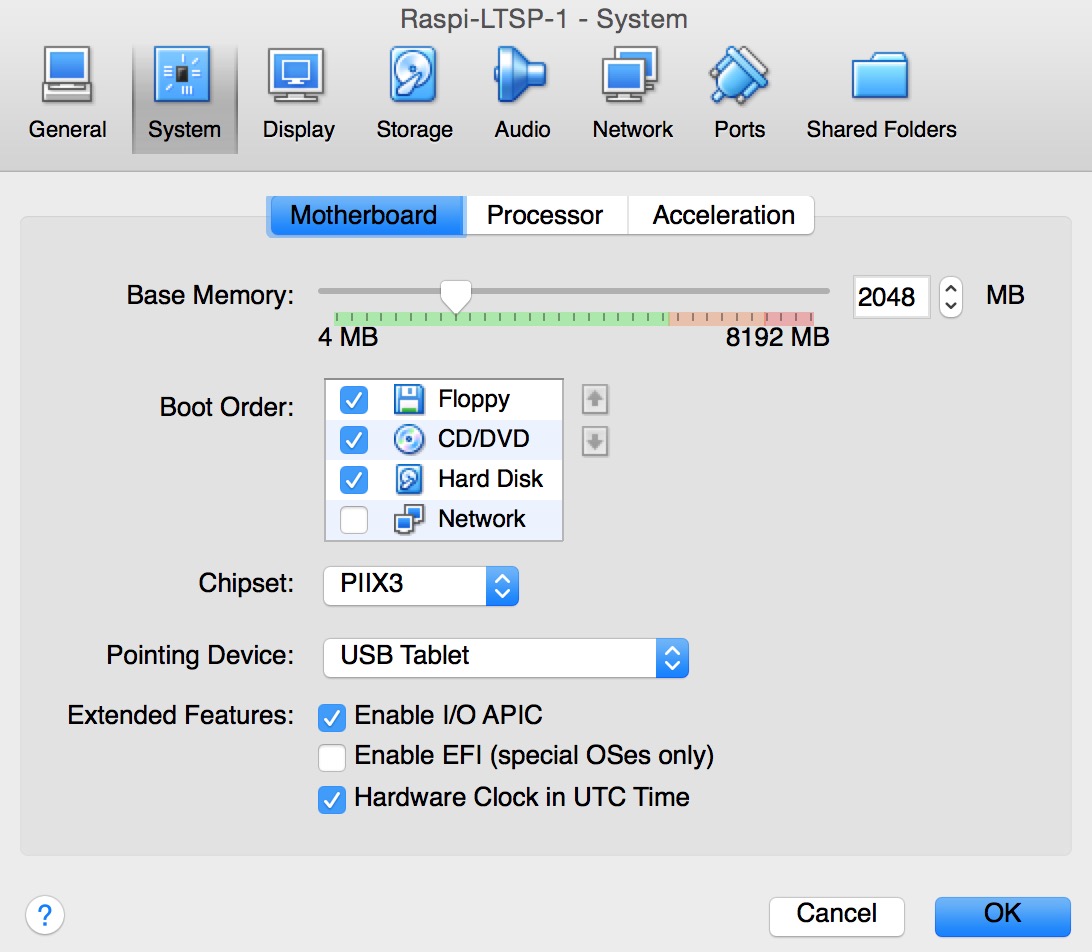
- Select how much RAM you want to give the virtual machine. At least 1GB is recommended as a minimum. If you have 4GB of RAM, anywhere from 1GB-1.5GB is fine. If you have 8GB of RAM, anywhere from 2GB-4GB of RAM is fine.
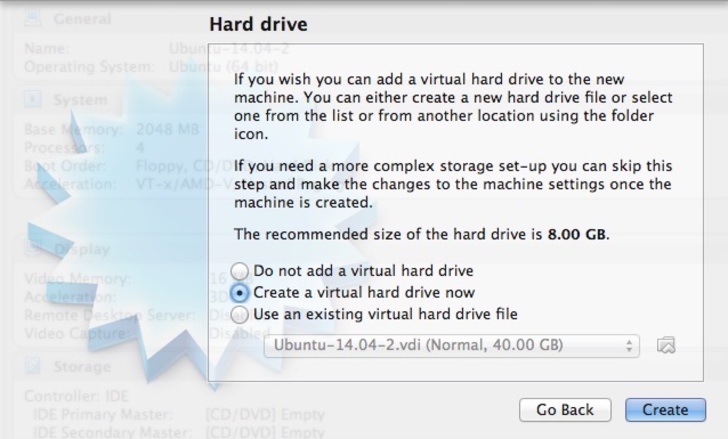
- Next we need to create the virtual hard drive. Select
Create virtual hard drive nowand clickCreate.
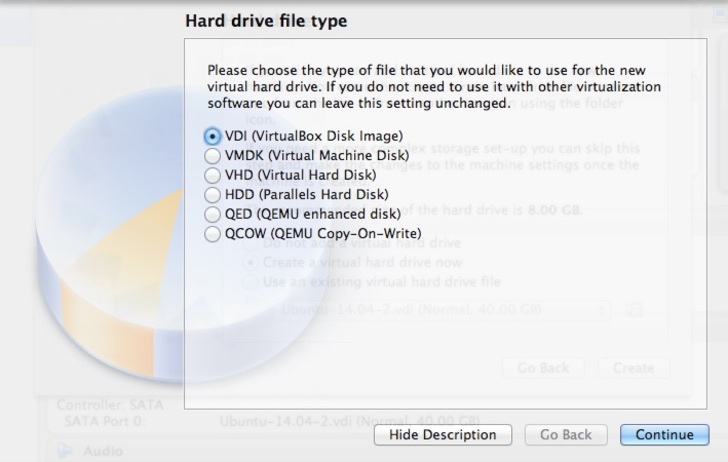
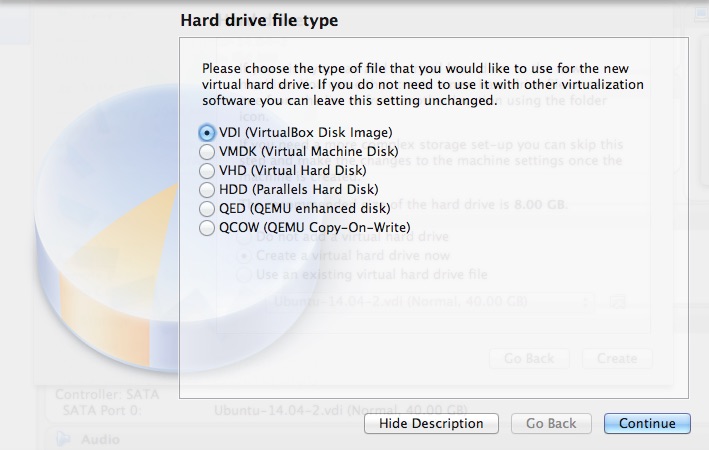
- Select
VID (VirtualBox Disk Image)and clickContinue.
- Select
Dynamically allocatedand clickContinue.
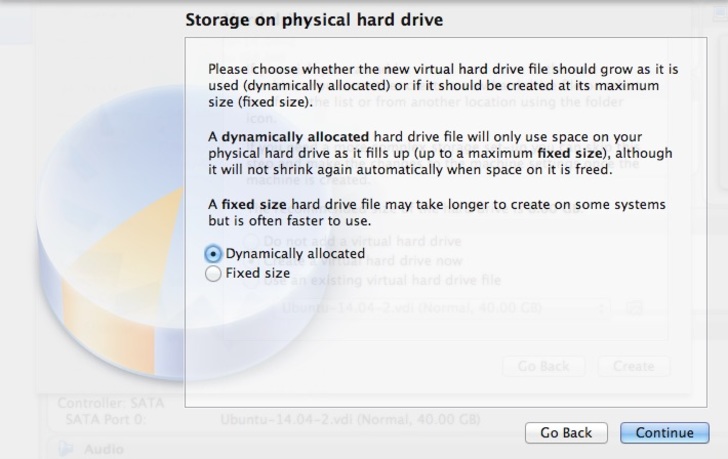
When setting the size, this is difficult to change later. By selecting
Dynamically allocatedin the last step, it means the size you select will not immediately be used. It will only be used if it is needed by the virtual machine.
I would suggest a virtual hard drive size of at least 20GB. If this is going to be your main Raspi-LTSP server (as opposed to just using it to try it out), I would suggest at least 30GB if not more.
A fully installed Ubuntu and Raspi-LTSP server uses around 13GB on its own. All extra space is for extra programs and students work.
Once you have decided your size, selectCreate.

You can now go onto installing Ubuntu as usual. The only thing to remember is you don't need to burn the Ubuntu ISO onto a DVD! When you start up the virtual machine, it will ask you to select an ISO to boot with.
Installing Ubuntu guide.
Once you are finished, check back here for changing key settings like networking settings. This is essential or you system will not work!


Configuring Virtualbox virtual machine
There is a number of things you may want to change with the virtual machine.
To open the settings panel, right click the virtual machine in VirtualBox and select Settings...
CPUs
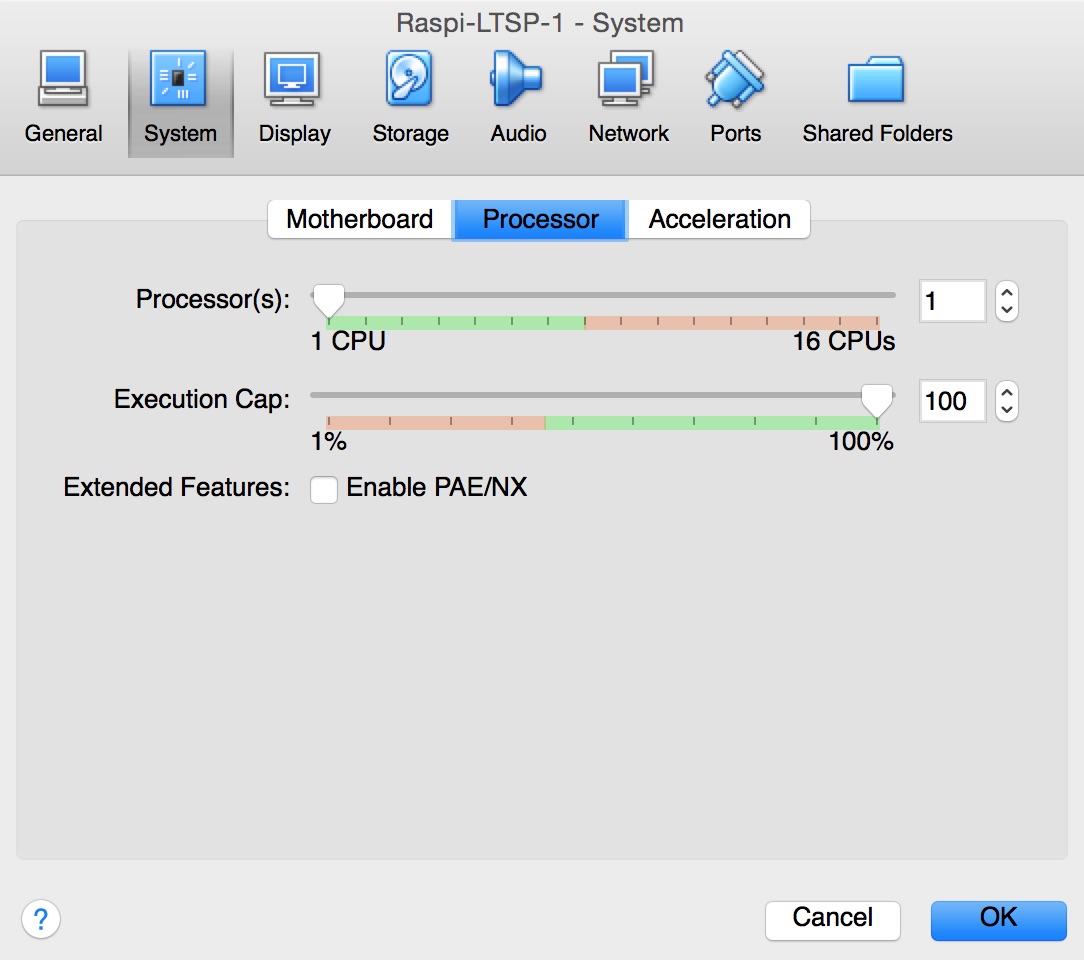
You can change the number of CPU cores the virtual machine has access to. By default virtualbox will only assign a single processor. If the computer you are using has many processor cores, it would be worth assigning more to the virtual machine.
It is not recommended assigning any more than 50% of your CPU cores to the virtual machine unless you know what you are doing.
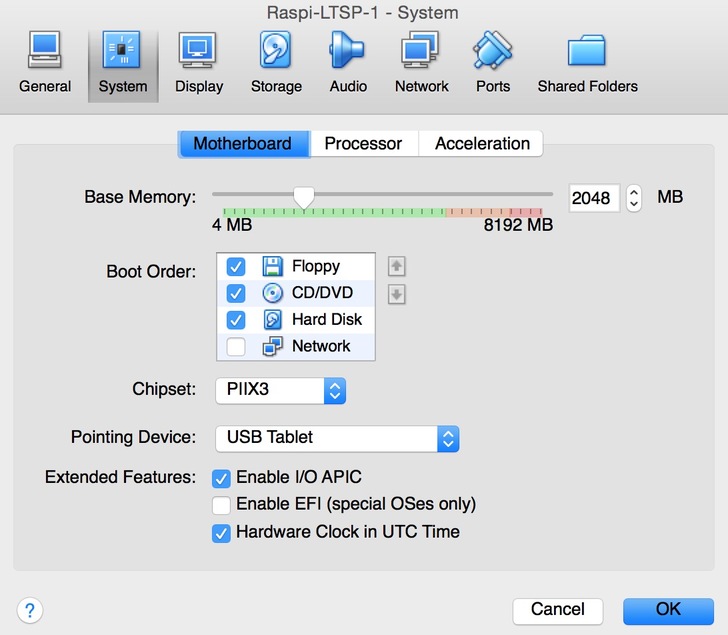
- After opening settings, select the
Systemtab.

- Select the
Processorsubtab. Here you can drag the slider to select how many processor cores you wish to assign to the virtual machine.
Networking
VirtualBox has a number of ways to create a virtual network card for the server. Each of them has their uses but also their issues.
To use RaspberryPi-ltsp, you must change the network adapter from the default.
1. After opening settings, select the Network tab.

2. For installation, it is recommended you keep the Attached to option as NAT.
3. Once installation is complete, you must switch to a Bridged adapter.
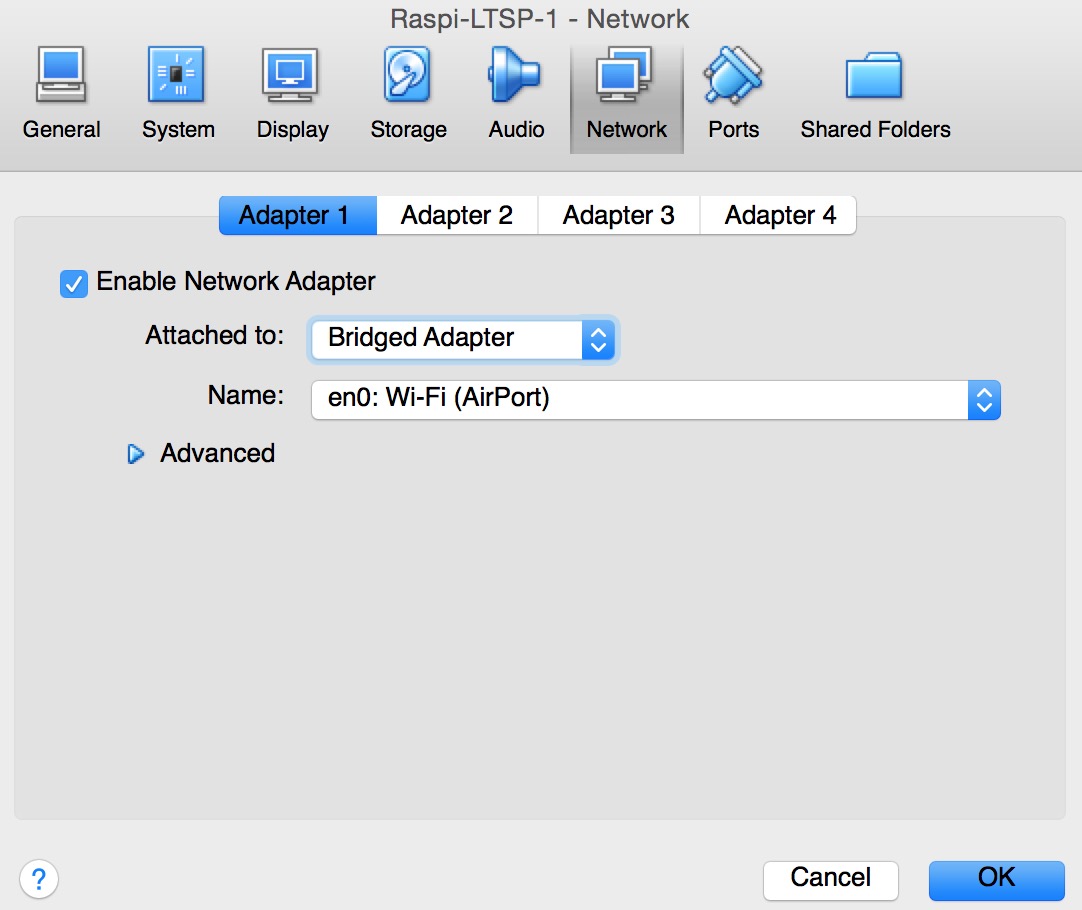 4. Once bridged adapter is selected, select your network card from the dropdown box. Most computers come with 2 network cards, a wired Ethernet card (you should be using this one) and a wireless card. Make sure the wired Ethernet card is selected!
If you do not know which is the wired and wireless card, Googling their names may help.
Guest additions
It can be a good idea to install the Virtualbox guest additions. These are additional software modules/drivers to improve compatibility with Virtualbox.
Once you install them, a few additional features are added, including support for bidirectional copy and paste support between the virtual machine and the host operating system, more importantly it adds the missing screen resolution detection modules for Ubuntu 14.04, allowing you to resize the screen.
To install them, launch the Ubuntu virtual machine, open a terminal and enter
sudo apt-get install -y virtualbox-guest-dkms virtualbox-guest-utils virtualbox-guest-x11
Once it is complete, you will want to reboot Ubuntu to apply them.
Virtualbox extension pack
A majority of hardware will just work out of the box without any issues with Virtualbox, but some obscure or random hardware may not due to licensing issues. Because of the open source licence virtualbox is provided with, closed source (aka source code for driver is kept secret) hardware drivers are not included in the standard installation.
Fortunately, these are still available, just only as compile binaries under a different licence. If you are having issues with a piece of hardware (a network card for example), you may want to install these. They can be found on the Virtualbox download page.